The main reason you might want change the Windows XP product key is because your key is pirated or otherwise incorrect but you don't want to reinstall Windows XP to activate your new legal product key.
Note: I created this step by step guide in addition to my original How to Change the Windows XP Product Key Code guide. There are several very specific steps in this process, many of which involve editing the Windows Registry, so this visual tutorial should help clear up any confusion.
Changing your Windows XP product key should take you less than 15 minutes.
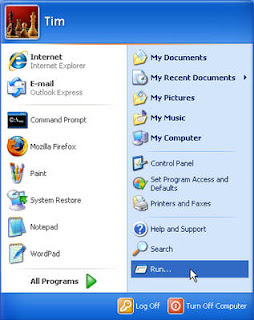
The first thing you need to do is click on Start and then Run....
Step 2 : Open Registry Editor
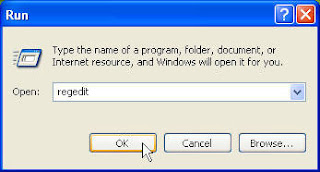
Now that the Run application is open, type regedit and then click the OK button.
The regedit command will open the Registry Editor application, used to edit the Windows Registry.
Step 3 : Navigate to the WPAEvents Registry Subkey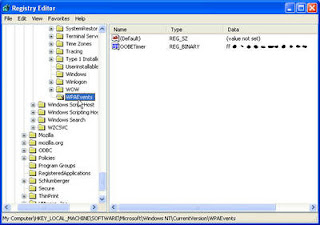
Before Continuing: Please be aware that changes to the Windows Registry are made in upcoming steps. Take great care in making only the changes described. I recommend that you backup the registry keys you're modifying in these steps as an extra precaution.
First, locate the HKEY_LOCAL_MACHINE folder under My Computer and click on the (+) sign next the folder name to expand the folder.
Continue to expand folders until you reach the HKEY_LOCAL_MACHINE\Software\Microsoft\WindowsNT\Current Version\WPAEvents registry key.
Click on the WPAEvents folder once.
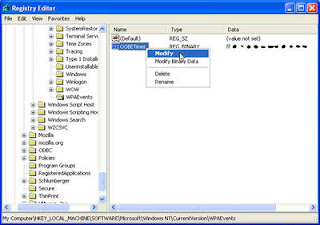
In the results that appear in the window on the right, locate OOBETimer.
Right-click on the OOBETimer entry and then click Modify from the menu that drops down.
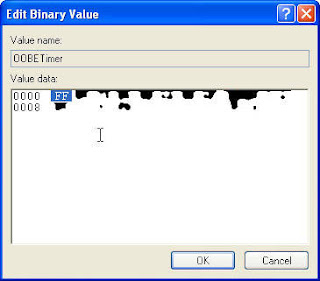
The screen you should see now is the Edit Binary Value window with OOBETimer in the "Value name:" field.
As part of the process to change your Windows XP product key, you'll need to deactivate Windows XP. Deactivating Windows XP is accomplished by changing the value of OOBETimer, something you're about to do.
Select any part of the OOBETimer value by double-clicking on it.
Note: I've distorted much of the hexadecimal series for OOBETimer in this and other screenshots but you'll see several letters and numbers on your computer.
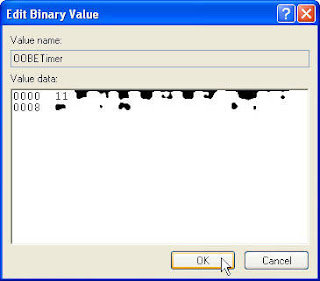
Enter any value you want over the selection you made in the previous step.
Note: The OOBETimer value just needs to change - it doesn't matter what it's changed to. As you can see in the screenshot above, I changed the first part of the value to 11 from FF.
Click the OK button to confirm the change.
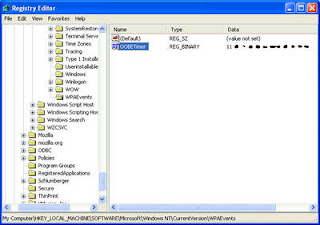
As you can see, the OOBETimer value has changed.
You can now close Registry Editor. We're done making changes in the registry.
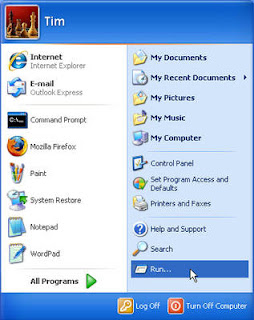
We're now going to open another program via a command.
Click on Start and then Run....
Step 9 : Open the Windows XP Activation Wizard
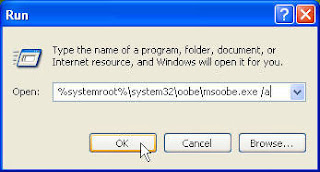
Now that the Run application is open, type the following command exactly:
%systemroot%\system32\oobe\msoobe.exe /a
Now click the OK button.
Note: In the command above, the only space is between "exe" and "/a". Also, all of the o's are letters - there are no zeros in the command.
This command opens the Windows XP Activation Wizard where we'll change the XP product key.
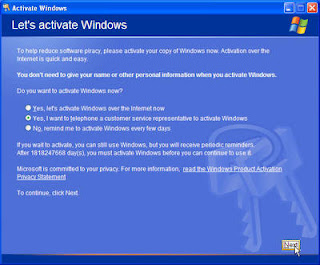
You should now see the Let's activate Windows window.
Choose the Yes, I want to telephone a customer service representative to activate Windows radio button and then click the Next button.
Note: You won't actually be activating Windows XP via the telephone at this time. This is just the step you have to take right now to get to the area where you can change the Windows XP product key.
Important: If you don't see the screen above but instead see a message notifying you that Windows XP is already activated, you may not have properly changed the OOBETimer value in which case you should start this process over.
If that still doesn't work, which is not uncommon, you should try changing the Windows XP product key with Winkeyfinder, a popular free product key finder program that can also change the XP product key. I like this manual process better since there's nothing to download but if it doesn't work for you, give Winkeyfinder a try.
Step 11 : Click the Change Product Key Button
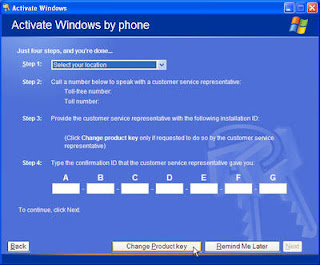
Click the Change Product Key button at the bottom of this window.
Note: Don't fill out anything on this screen since this is part of a Windows XP activation process, something you may or may not be doing after your product key is changed.
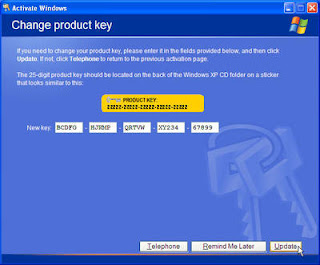
Locate your valid Windows XP product key and enter it here.
After entering the product key, click the Update button.
Note: The product key in the screenshot above is not a valid Windows XP product key. It is provided for example only.
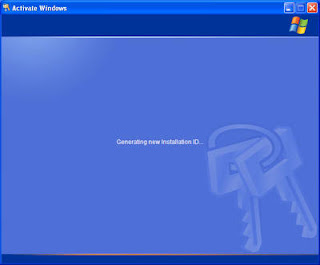
After updating your Windows XP product key, the Windows XP Activation Wizard will generate a new Installation ID which will be used to activate Windows XP.
This screen is only momentarily displayed. If you don't see it, don't worry. It probably just happened too quickly to notice.
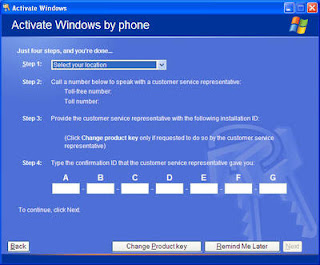
Now that your product key is changed, you'll need to reactivate Windows XP.
You should now be seeing the Activate Windows by phone screen. This is one method of activating Windows which you're more than welcome to use.
If you click the Back button, you'll see that you have the option of activating over the Internet - a much easier and faster way to activate Windows XP assuming you have an Internet connection on the computer.
If you'd rather postpone activating Windows XP until a later date, you can click the Remind me later button on this window or choose the No, remind me to activate Windows every few days radio button on the main activation screen.
Step 15 : Confirm Reactivation of Windows XP
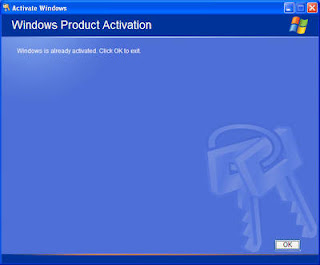
After activating Windows XP, you can verify that activation was successful by repeating Step 8 and then Step 9.
The Windows Product Activation window that appears in place of Step 10 should say "Windows is already activated. Click OK to exit."